Check your Rewards Here!

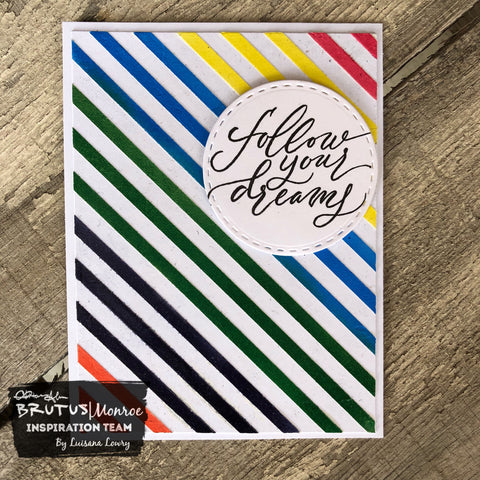
Rainbow themed card
Hi everyone, thank you for stopping by for another post by yours truly.
Don’t you just love it when you are experimenting with something, seeing what could come out of it and you hit a lucky streak and you end up with an amazing project that blows your mind away.
That’s what happened with this little gem.
It all started with the pixie spray. I wanted to play with it with all the things in my craft room, so naturally I played and played and played some more with all of my stencils. That stuff is some kind of out of world sorcery because it is just amazing!
Alright, no more story time and right on to the project. My thought behind this card was adding texture to a card using stencil paste in white and then placing the stencil back on top of the card stock and using my surface inks to make them any color I wanted.
I started by spraying the back side of the stencil with pixie spray and then placing it on a scrap piece of cardstock. I applied a generous amount of this white stencil paste by Brea Reese that I found at my local Tuesday morning and using this super cool craft spatula I spread it evenly all over. I removed the stencil carefully and let the paste dry completely for about an hour. In the mean time I washed my stencil and spatula and cleaned my working surface.

Once the paste was completely dry I placed my stencil back to the cardstock, exactly as I had placed it before, covering the areas with no paste really well.
Now came the fun part. I picked several random colors from my surface inks collection and grabbed the corresponding blending sponges for them.

I counted my stripes so I could make the colors evenly and masked the areas I didn’t want colored and proceeded to apply a generous amount of surface ink to each section. Surface inks are so cool and when you heat set it they become permanent. I removed the stencil carefully and applied some heat to the whole card using my heat gun.

When everything was good and dry I cut my panel to a size A2 and that’s when it hit me, I had just made this awesome PRIDE themed card... and proud I was. So naturally I had to find a sentiment to match the color essence of the card and this one from this set was just perfect.

There you have it. That’s the long story behind this awesome card. I hope you enjoyed reading about how I made it and that you were inspired to create something beautiful today.
Please come join us on Wednesday for our blog hop, but until then, keep on creating.
Much love,
Luisana.

Leave a comment