Check your Rewards Here!

Visions of Color
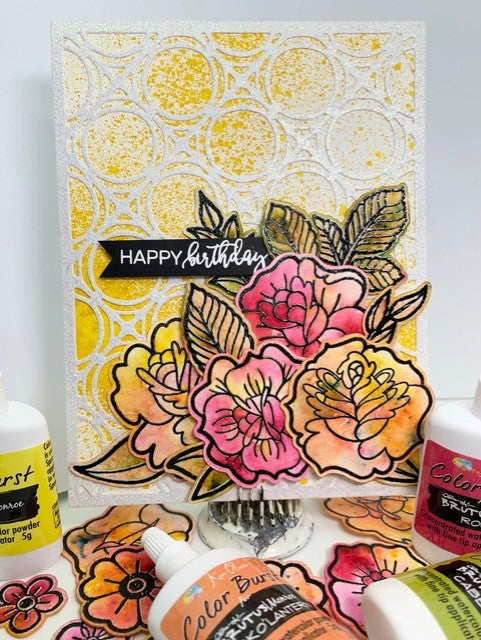
Hey all! It’s Jessica V here from Purple Puppy Papercrafting and I’m so excited to be a guest on the Brutus Monroe blog today! As soon as I saw this Inked Flowers set, I had visions of Color Bursts in my head! I am featuring this set along with some heat embossing, Color Bursts, and Glitterstock! (In my opinion, you can never have too much glitter on a project - give me all the sparkle!)

I started out by using my MISTI to stamp all the flower and leaf images in the Raven Detail Ink and then cut the images out using my Brother Scan n Cut. I left the stamps on the door of my MISTI for the next step. Once the images were cut out, I used the negative portion of the sheet and placed that back into my MISTI and put the die cuts back into their little spots. This allows me to stamp the images in the same spot without having to worry about lining them back up. I am stamping them again, because now I want to emboss them with the Icicle embossing powder. I don’t like to cut out embossed images on my Scan n Cut because I don’t think I get as good of scan due to the raised and shiny lines. So this is the process I use when I want to cut out something embossed, thank goodness for the MISTI!
And here comes the best part - Color Bursts!! I put only the flowers that I wanted to color with a specific Color Burst onto my work surface at a time, and I used the negative sheet to put them back in while working to help prevent them from moving all over my desk. I would then switch out images for the next color and so on until they were all colored. Color Bursts can be messy, but so cool!

For the background, I sprayed some of the Phonebook Surface Spray direclty onto the front of my card base, and let that dry - it doesn’t take long! And then used the Circles Background Die with Fallen Snow Glitterstock - oh that sparkle and shine!! I glued the die cut background directly onto my sprayed card base. Then, I just used a combination of liquid glue and Foam Tape to adhere the flowers and leaves onto my background. I first laid them out how I wanted them to be, and used some purple tape to keep them together in that arrangement as I was adhering them onto the card.

For the sentiment, I used the “Happy Birthday” stamp from the Feathered Friends stamp set, and embossed that onto black cardstock with the Alabaster embossing powder. I just cut it down into a strip, and used my scissors to cut a banner on one end. To be able to tuck it under one of the flowers like I wanted, I had to trim the other end at a bit of an angle to get it to fit. And here is our finished card!

Thank you so much for checking out my card! I hope you all enjoyed!
You can check out my video here for more details!
Purple Puppy Papercrafting Social media links:

Comments
Leave a comment